I won’t spend much time explaining the functioning of a siem and the architecture of Wazuh, there is already this very well done article.
So I will make a brief (as far as possible) preamble.
In a company now more than ever, the importance of having a log collection and analysis system is necessary.
There are many commercial products that are very valid for this purpose. But there is no such thing as an out-of-the-box product.
Every company, every configuration is different from the others, and tailor-made tuning must be carried out for each product.
Why Wazuh?,
It is supported by a very large community and in addition to offering Siem functionalities, it also offers XDR ones and it is free.
It is distributed with Agent for Linux, Windows, macOS, Solaris, AIX, HP-UX. So it covers a vast verity of platforms.
And it is highly customizable.
In future articles we will see how to integrate it with other devices.
THE COMPONENTS
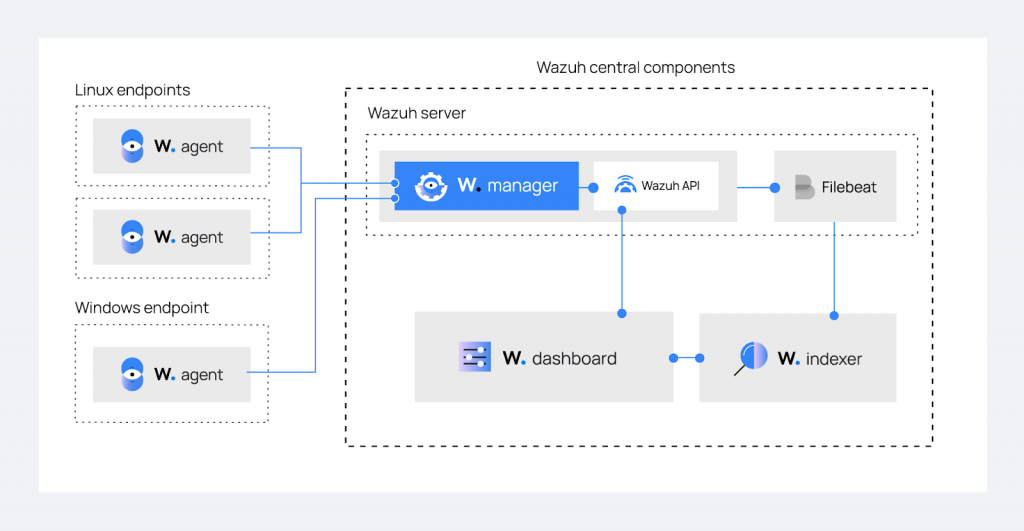
Multi-Platform Agent, they send the logs collected on clients to the Wazuh server via ports 1514-1516.
WAZUH-SERVER
And the component that analyzes logs The data is managed by Analysisd which will first proceed with a “Pre Decoding“, “Decoding” and “Rule Matching”, based on the default internal decoders in /var/ossec/ruleset/decoders, to the rules in /var/ossec/ruleset/rules. custom decoders and rulesets are found in /var/ossec/etc/decoders and /var/ossec/etc/rules.
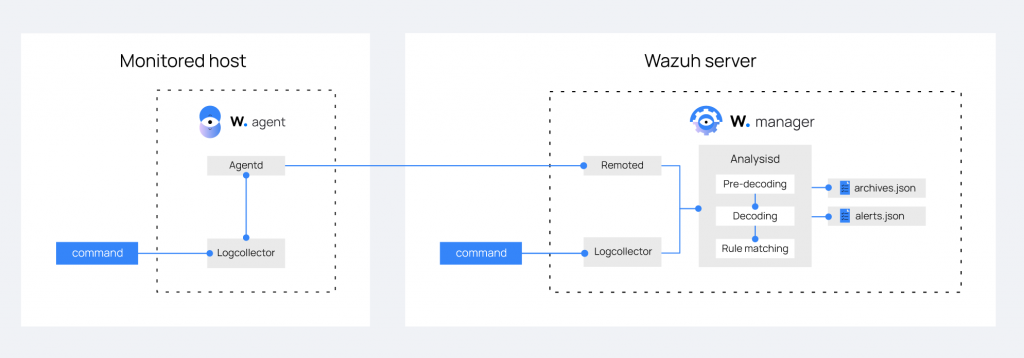
If the forwarded event triggers an Alert rule, a Message is generated in the /var/ossec/logs/alerts/alerts.json and alerts.log files.
However, if the yes function is enabled in /var/ossec/etc/ossec.conf, all the Alerts and messages identified by the rulesets with an id equal to or greater than 3 are stored in the /var/ossec/ file logs/archives/archives.json and archives.log.
Once the messages have been generated in the log files, they must be integrated into the Siem, which is why the Wazuh installation package installs and configures Filebeat by default.
FIlebeat monitors /var/ossec/logs/alerts/alerts.json for new messages and forwards it to the Wazuh-Indexer.
WAZUH-INDEXER
The Heart of Siem is Wazuh-Indexer (v4.5.2) which is nothing more than a Fork of Opensearch (v2.6.0) which in turn is a Fork based on Elasticsearch (v.7.10.2).
In the basic installation the data is integrated via Filebeat, but as we will see later Loghstash is also supported.
For data viewing and configuration file changes Wazuh install WAZUH-DASHBOARD
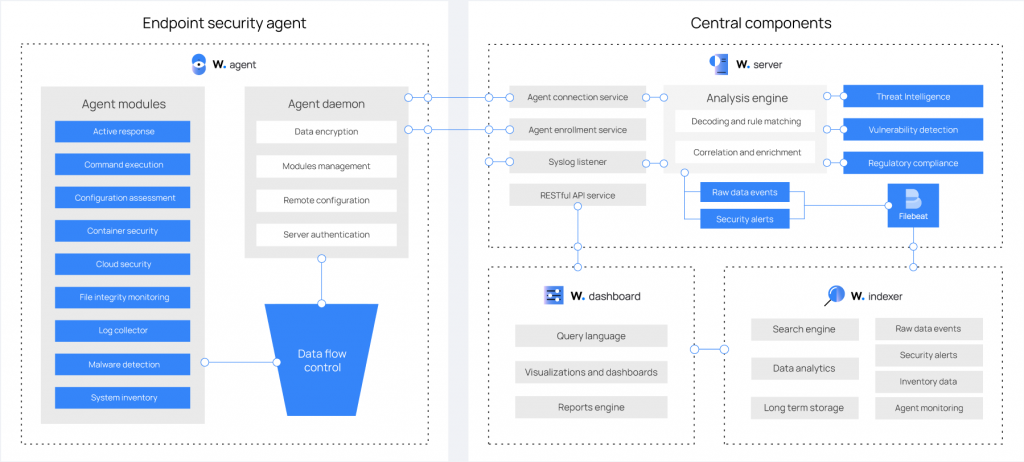
WAZUH-DASHBOARD
And the web interface used to filter and analyze our data. Wazuh-Dashboard(v4.5.2) is a Fork of OpenSearch Dashboards (v2.6.0) which in turn is a Fork based on Kibana (v.7.10.2).
If desired, Wazuh can be integrated into standalone installations of Opensearch and Elasticsearch. https://documentation.wazuh.com/current/integrations-guide/index.html
Once you have refreshed these concepts it will be easier to understand this guide
Step by Step Guide to Installing Wazuh 4.5.2 Open Source XDR/SIEM on Ubuntu 22.04 Server LTS
This guide is designed for an all-in-one installation, but is easily adapted to be integrated on multiple servers. The installation of the components was done by integrating the manufacturers’ repositories as much as possible so as to be able to update all the systems with a simple command.
We can install Wazuh in 3 ways:
1- Installation from source compilation.
2- Installation of the system via repository and manual configuration of the various services.
3- Installation of the system via repository with auto-configuration script.
We will opt for the 3 option which installs via repository and generates certificates automatically, giving us a fully functional system in just a few minutes.
The first step is to upgrade the system.
Assuming you are root otherwise prepend the sudo command.
apt-get update
apt-get dist-upgrade -y
Download and run the Wazuh automatic installation script.
curl -sO https://packages.wazuh.com/4.5/wazuh-install.sh && sudo bash ./wazuh-install.sh -aOnce the installation is complete, the script will return a message on the shell containing a username and password to access the dashboard. Save it in a safe place
12/09/2023 17:26:54 INFO: Wazuh dashboard web application initialized.
12/09/2023 17:26:54 INFO: --- Summary ---
12/09/2023 17:26:54 INFO: You can access the web interface https://<wazuh-dashboard-ip>:443
    User: admin
    Password: xB79jrtBU+y.76WbxPRe0XLTvftG3MwV
12/09/2023 17:26:54 INFO: Installation finished.
Now let’s verify that the services are installed and running:
systemctl status wazuh-manager
systemctl status wazuh-indexer
systemctl status filebeat
Now our system is ready
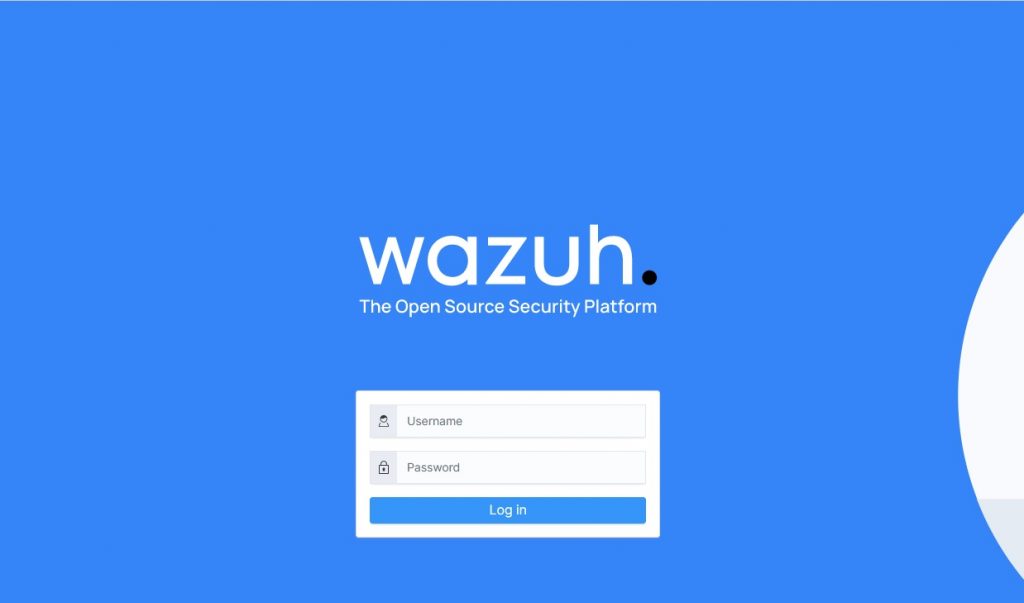
Let’s connect to the IP address of the machine via Browser in https and accept the security exception, given that the certificate is self-signed
On the login screen, enter the username and password generated by the installation script.
Now to proceed with our tests, we need to insert an agent that begins to populate our Siem.
If we have a mixed ecosystem of Windows/Linux machines, let’s differentiate them by creating 2 separate groups.
To create a Group, click on Wazuh > Management > Administration > Groups
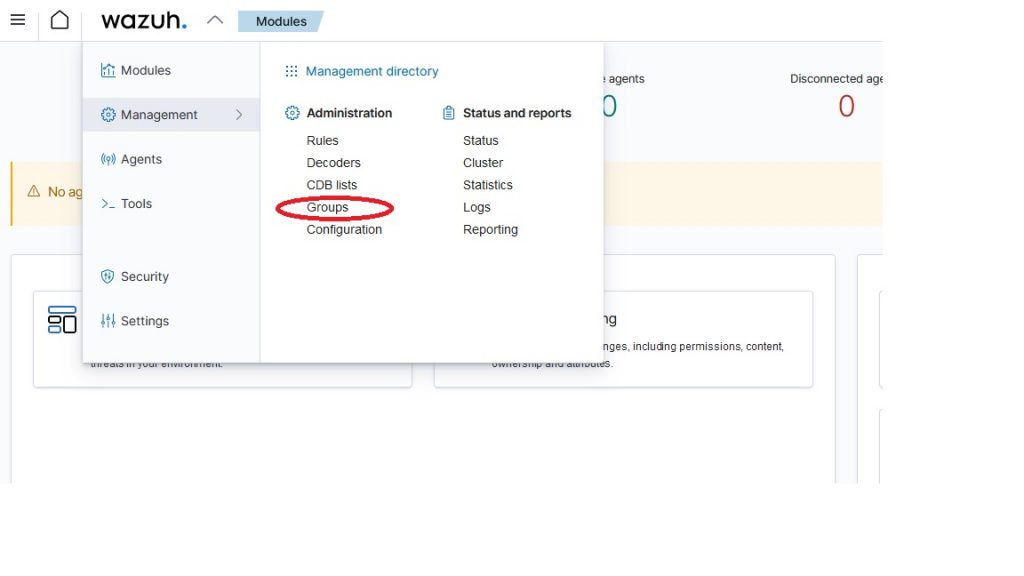
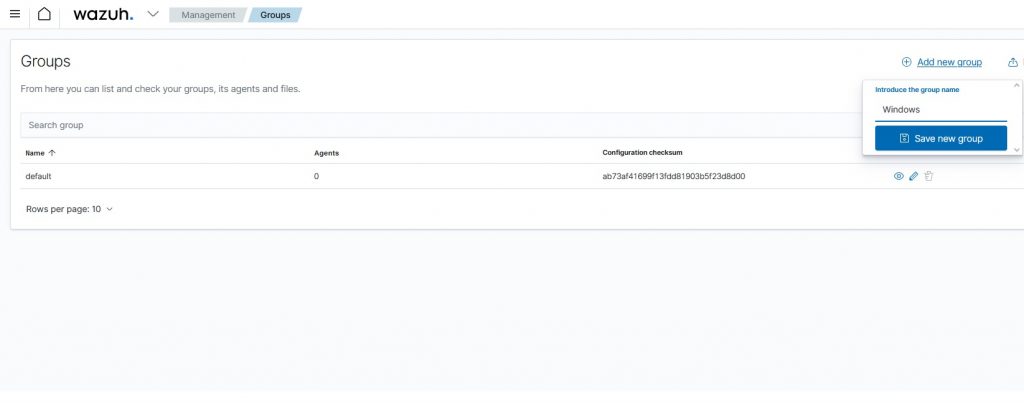
Click at the top right on “Add new group”, and insert the “Windows” group and the “Linux” group.
Now we can begin to deploy our Agent.
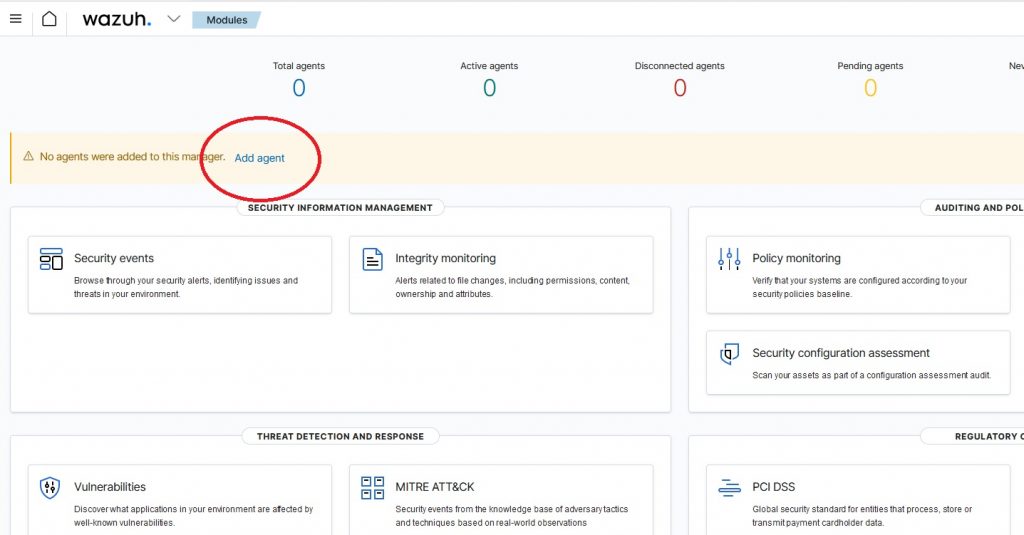
Then on the main screen we click on “Add agent”
We select the type of platform, in my case Windows, version higher than Windows 7.
In the “Wazuh server address” field, enter the IP of the Wazuh server to which the logs will be transmitted.
The Agent Name field can be left blank, while in “Select one or more existing groups” we select the previously created group “Windows”.
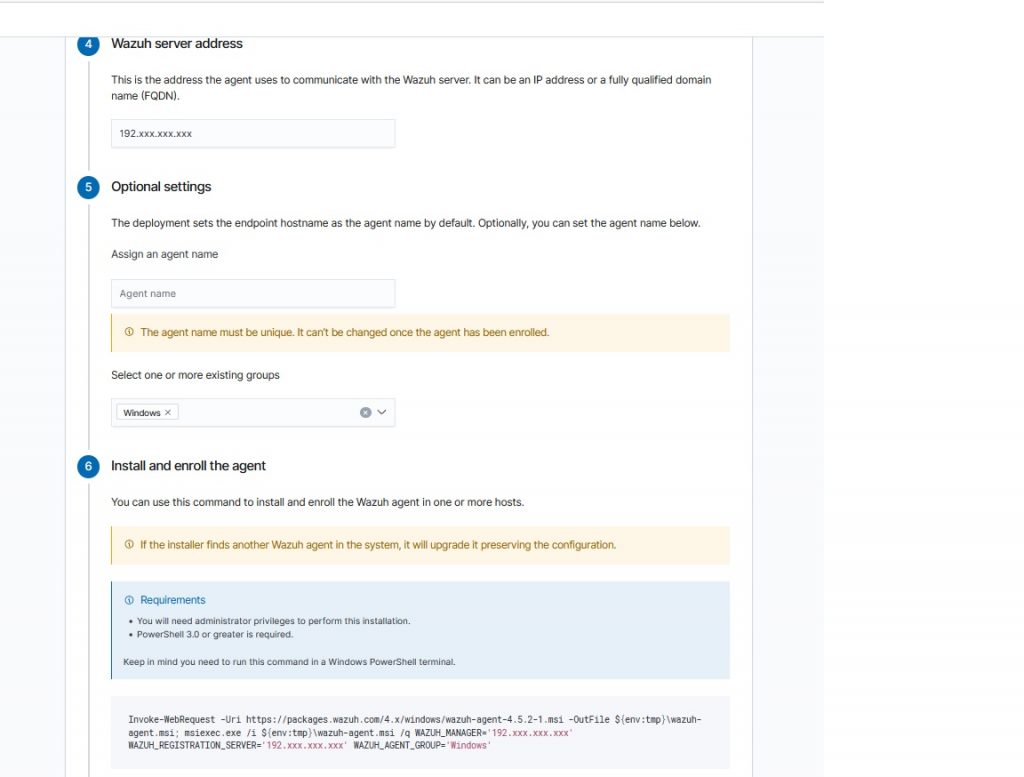
It will warn us that Powershell 3.0 or higher is required but now the minimum usable version of Windows is 10 and is already integrated.
Click on “Invoke-WebRequest -Uri https://packages……. “ to copy the command.
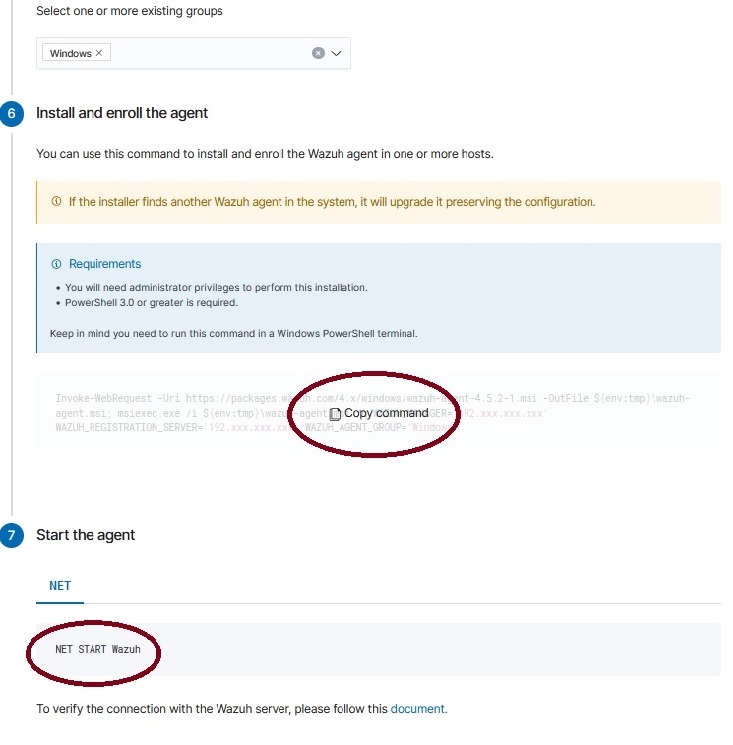
Open Powershell as administrator and run the command on the machine on which to install Agent.
Once completed, start the service from the command prompt as administrator with the command “NET START Wazuh”, or restart the machine and the service will start automatically
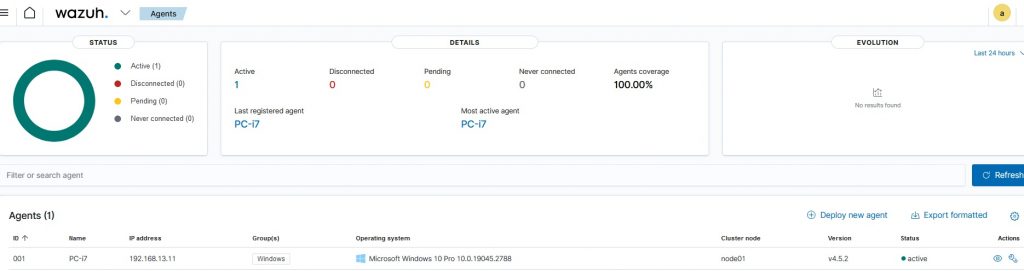
Once the service has started, just wait a few moments and a “New connected agents” will appear.

Now our computer will appear in the Wazuh > Agent menu.
Click on it and you will enter the host panel where a summary will appear for the enabled modules, Compliance, Miter, SCA (To enable or disable the modules already pre-installed, enter the Wazuh > Setting > Modules menu).
Here all the events identified by the rules with id greater than or equal to 3 will be displayed.
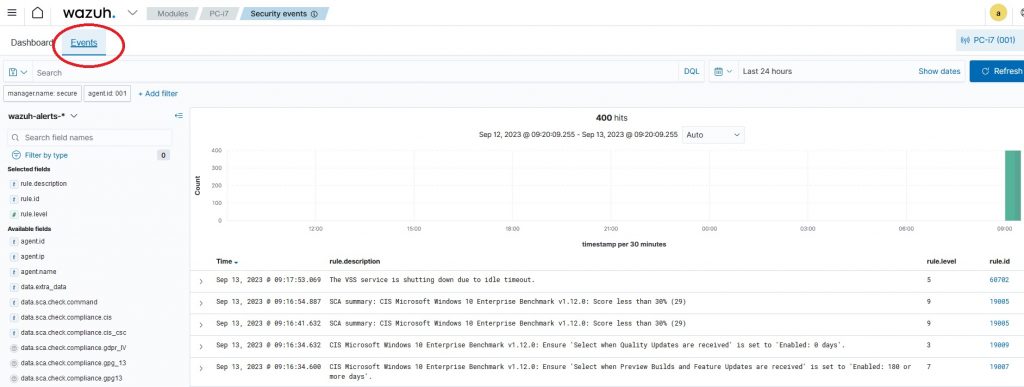
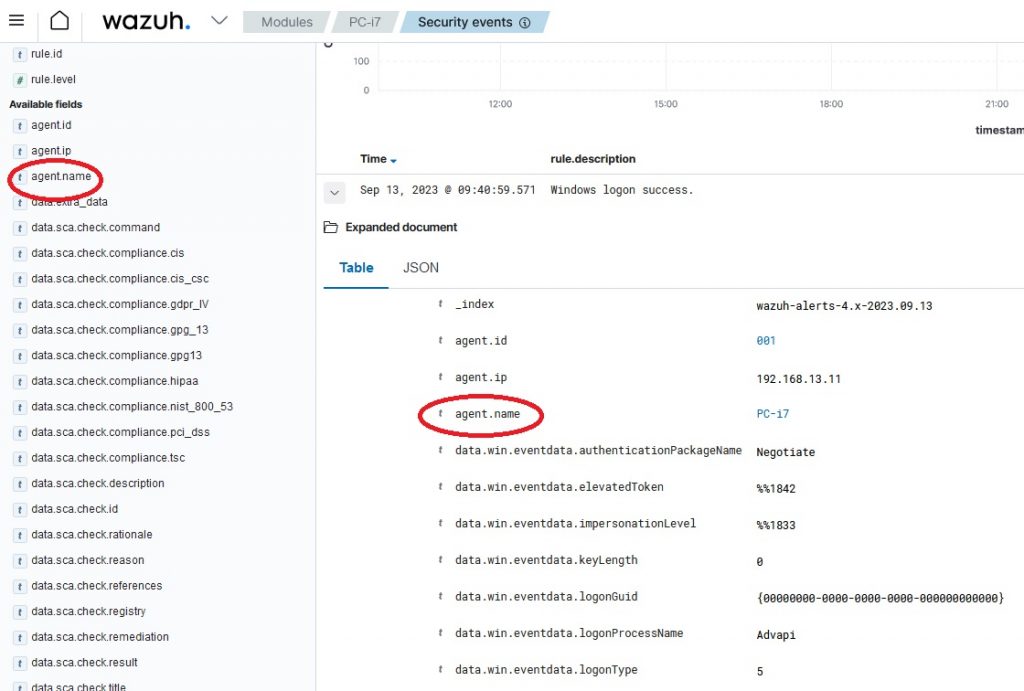
By clicking on an event we have the possibility to see the log sent already processed by the Wazuh-Manager, and we have the possibility by opening it to use the fields present as filters for our searches.
At this point we just have to enable notifications in case a serious event occurs, because a monitoring system that does not notify events is not a good thing.
Edit the /var/ossec/etc/ossec.conf file in the <gobal>section
Enable sending emails with:
<email_notification>yes</email_notification>Enter the SMTP server to use:
<smtp_server>smtp.emaildomain.com</smtp_server>Set the recipient for emails:
<email_to>your@emaildomain.com</email_to>Set the email sender:
<email_from>wazuh@emaildomain.com</email_from>This is a simple configuration for sending Wazuh email notifications, it works if you use your own smtp server that does not require authentication, but in the real world you need to use an smtp service with authentication.
For this reason I invite you to consult this article “Configuring Ubuntu 22.04 with gmail or another email via Postfix” which explains how to configure the sending of emails from the Wazuh server with Postfix in relayhost (smarthost) authenticated using your own mail service or gmail, so as to be sure that the notifications arrive and are not blocked.
Now with this installation we can become familiar with the Wazuh interface and its modules.
In the next articles we will expand the configuration for real use in an environment made up of Windows machines.
If you need help or want to give suggestions, feel free to contact me on My Linkedin profile https://www.linkedin.com/in/valerio-puglia-332873125/